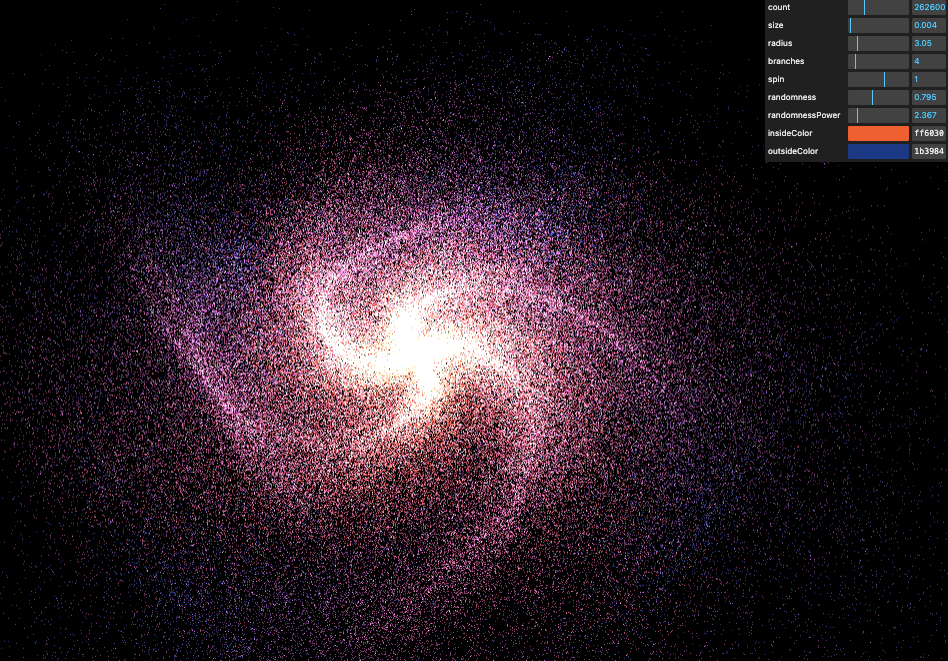
Galaxy Generator
Mesh / Geometry / Typed Array
原本的 mesh + material 的過程, 因為要自定義內容
mesh >>> bufferGeometry + Typed Array 所組合的 mesh
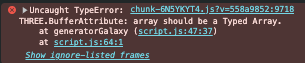
[!WARNING] bufferAttribute 是需要搭配 TypedArray 做使用的, 否則會報錯
-
性能:
TypedArray提供比普通 JavaScript 陣列更高效的內存管理和數據訪問方式,這對於渲染大量的幾何體(如頂點)是非常重要的。 -
WebGL 支援:WebGL 需要數據以
TypedArray格式進行處理,這樣它可以在 GPU 上快速處理這些數據。普通的 JavaScript 陣列並不適合這種高效的數據交換方式。
const generatorGalaxy = () => {
// 創建一個 BufferGeometry(緩衝幾何體),用來存放星系的點
const geometry = new THREE.BufferGeometry();
// 創建一個 position 容器, 物件種類為 Float32Array 長度為 parameters.count * 3 [x, y, z, a, b, c, o, p, q...]
const positions = new Float32Array(parameters.count * 3);
// const positions = new Array(parameters.count * 3).fill(0); 這是會錯誤的
// 迴圈生成每個點的隨機位置
for (let i = 0; i < parameters.count; i++) {
const i3 = i * 3; // 計算當前點在 positions 陣列中的索引(每個點有 3 個數值)
// 隨機產生 X 座標,範圍為 -1.5 到 1.5
positions[i3 + 0] = (Math.random() - 0.5) * 3;
// 隨機產生 Y 座標,範圍為 -1.5 到 1.5
positions[i3 + 1] = (Math.random() - 0.5) * 3;
// 隨機產生 Z 座標,範圍為 -1.5 到 1.5
positions[i3 + 2] = (Math.random() - 0.5) * 3;
}
// 設定幾何體的 "position" 屬性,將點的座標資料存入 BufferGeometry
geometry.setAttribute("position", new THREE.BufferAttribute(positions, 3));
// 創建 PointsMaterial(點材質),用來定義點的外觀
const material = new THREE.PointsMaterial({
size: parameters.size, // 設定點的大小
sizeAttenuation: true, // 啟用距離衰減,讓遠處的點更小
depthWrite: false, // 停用深度寫入,確保顆粒的混合效果
blending: THREE.AdditiveBlending, // 使用加法混合,讓顆粒有發光的效果
});
/**
* 創建 Points(點雲物件)
*/
const points = new THREE.Points(geometry, material); // 使用剛剛建立的幾何體和材質來生成點雲
scene.add(points); // 將點雲加入場景
};
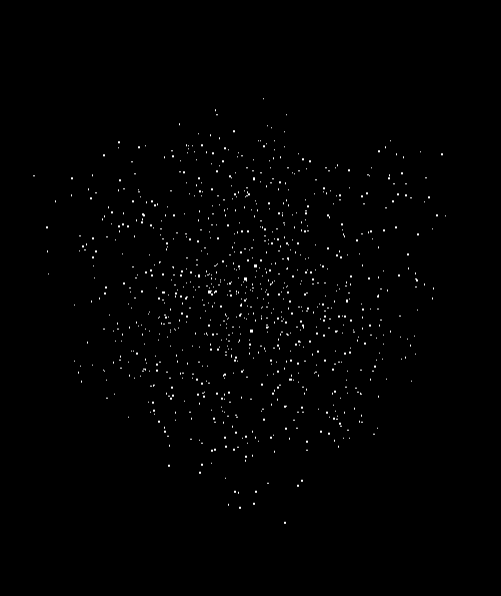
generatorGalaxy();可以看到全部粒子分佈長寬高被限定在 -1.5 ~ +1.5 的立方體中
dispose / remove
透過 gui 的調整, 會造成覆蓋, 所以需要移除前一次的內容,
- 釋放幾何體的記憶體(
geometry.dispose()) - 釋放材質的記憶體(
material.dispose()) - 從場景中移除星系(
scene.remove(points))
let geometry = null;
let material = null;
let points = null;

// Destroy old galaxy
if (points !== null) {
  geometry.dispose();
  material.dispose();
  scene.remove(points);
}
math
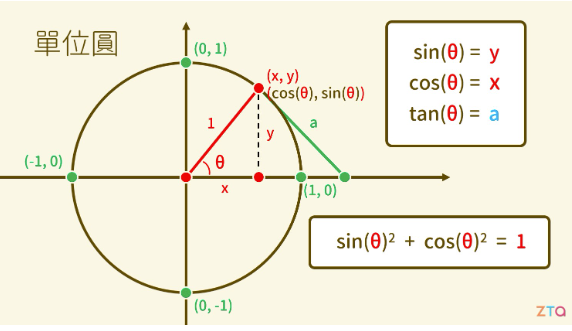
\begin{equation}
\sin^2\theta + \cos^2\theta = 1
\end{equation}
θ 在 0 - 2π 的區間都會產生 r = 1 的圓
// 產生星系內最大半徑的數值
const pointInGalaxyRadius = Math.random() * parameters.radius;
// 分組取得圓的比例分佈 0, 0.33, 0.66 -> 乘上 π 獲得角度
const branchAngle =
  ((i % parameters.branches) / parameters.branches) * Math.PI * 2;

// 獲得 x 軸在 r = pointInGalaxyRadius 的分佈
positions[i3] = Math.cos(branchAngle) * pointInGalaxyRadius;

positions[i3 + 1] = 0;

// 獲得 z 軸在 r = pointInGalaxyRadius 的分佈
positions[i3 + 2] = Math.sin(branchAngle) * pointInGalaxyRadius;
循環生成每個粒子
for (let i = 0; i < parameters.count; i++) {開始一個循環,為每個粒子生成數據。
計算陣列索引
// Position
const i3 = i * 3;
計算當前粒子在陣列中的基準索引。由於每個粒子需要 3 個值(x, y, z 或 r, g, b),所以索引是 i * 3。
生成粒子離星系中心的距離半徑
const radius = Math.random() * parameters.radius;計算分支角度
const branchAngle =
  ((i % parameters.branches) / parameters.branches) * Math.PI * 2;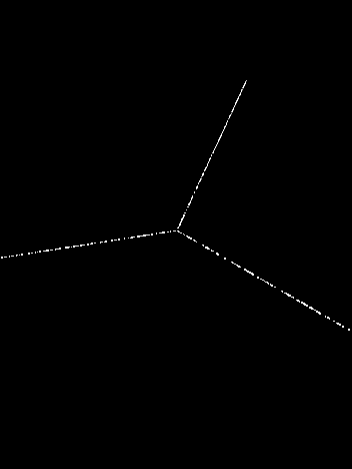
計算粒子所在的分支角度。這裡:
i % parameters.branches確定粒子屬於哪個分支(0 到 branches-1)- 除以
parameters.branches得到 0 到 1 之間的值 - 乘以
Math.PI * 2(360度)將其轉換為角度
例子:如果 parameters.branches = 3,那麼粒子將被分配到三個分支上,角度分別為 0°、120° 和 240°。
為當前粒子生成一個隨機半徑,範圍是 0 到 parameters.radius。這決定了粒子離星系中心的距離。
計算旋轉角度
const spinAngle = radius * parameters.spin;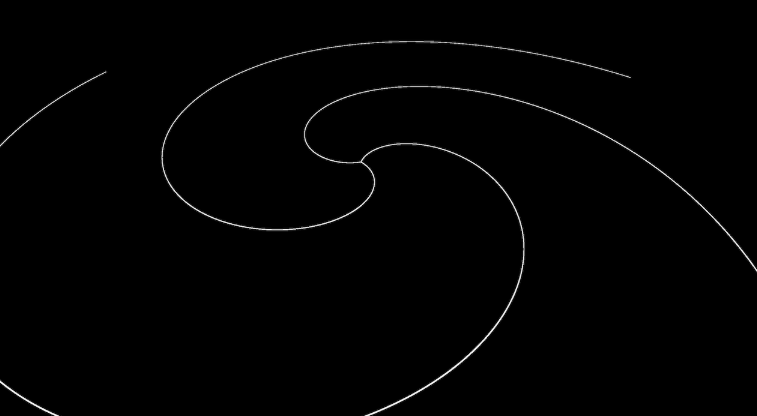
計算旋轉角度,隨著半徑增加而增加。這創建了星系的旋轉效果,parameters.spin 控制旋轉的程度。
例子:如果 parameters.spin = 1,則半徑為 5 的粒子將比半徑為 2.5 的粒子多旋轉 2 倍。
添加隨機偏移
const randomX =
  Math.pow(Math.random(), parameters.randomnessPower) *
  (Math.random() * 1) *
  parameters.randomness *
  radius;
const randomY =
  Math.pow(Math.random(), parameters.randomnessPower) *
  (Math.random() * 1) *
  parameters.randomness *
  radius;
const randomZ =
  Math.pow(Math.random(), parameters.randomnessPower) *
  (Math.random() * 1) *
  parameters.randomness *
  radius;
為每個軸添加隨機偏移,使星系看起來更自然:
Math.pow(Math.random(), parameters.randomnessPower)創建非線性分佈parameters.randomness控制總體隨機性的強度radius使隨機性隨著距離中心的增加而增加
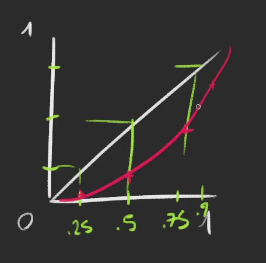
例子:如果 parameters.randomnessPower = 3,大多數值會更靠近 0(而非均勻分佈),創造出更集中的星系分支。
設置粒子位置
positions[i3] = Math.cos(branchAngle + spinAngle) * radius + randomX;
positions[i3 + 1] = randomY;
positions[i3 + 2] = Math.sin(branchAngle + spinAngle) * radius + randomZ;
計算並存儲粒子的最終位置:
- X 座標:使用餘弦函數,基於角度和半徑,加上隨機偏移
- Y 座標:只有隨機偏移(這使星系在 y 軸上變薄)
- Z 座標:使用正弦函數,基於角度和半徑,加上隨機偏移
這創建了螺旋狀的星系分支,branchAngle + spinAngle 組合使較遠的粒子沿著螺旋更多地旋轉。
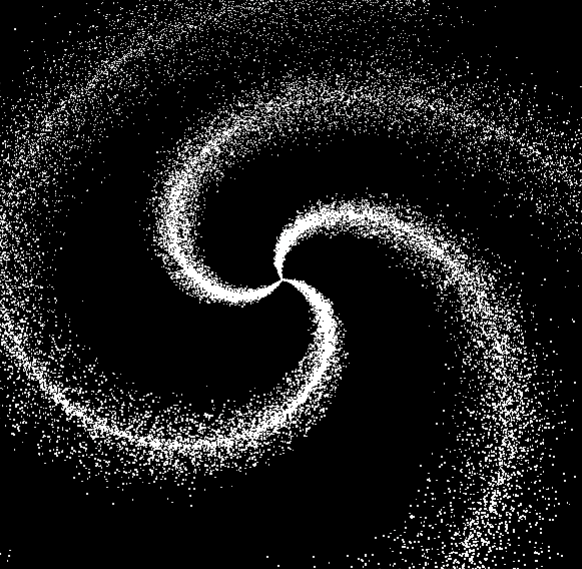
Color
const colorInside = new THREE.Color(parameters.insideColor);
const colorOutside = new THREE.Color(parameters.outsideColor);
創建兩個顏色對象:
colorInside:星系內部的顏色colorOutside:星系外部的顏色
這些顏色將被用於創建從星系中心到邊緣的漸變效果。
lerp 是 linear interpolation 的縮寫,意思是「線性插值」,它是一種在兩個數值或向量之間進行平滑過渡的數學運算方法。
// Color
const mixedColor = colorInside.clone();
mixedColor.lerp(colorOutside, radius / parameters.radius);

colors[i3] = mixedColor.r;
colors[i3 + 1] = mixedColor.g;
colors[i3 + 2] = mixedColor.b;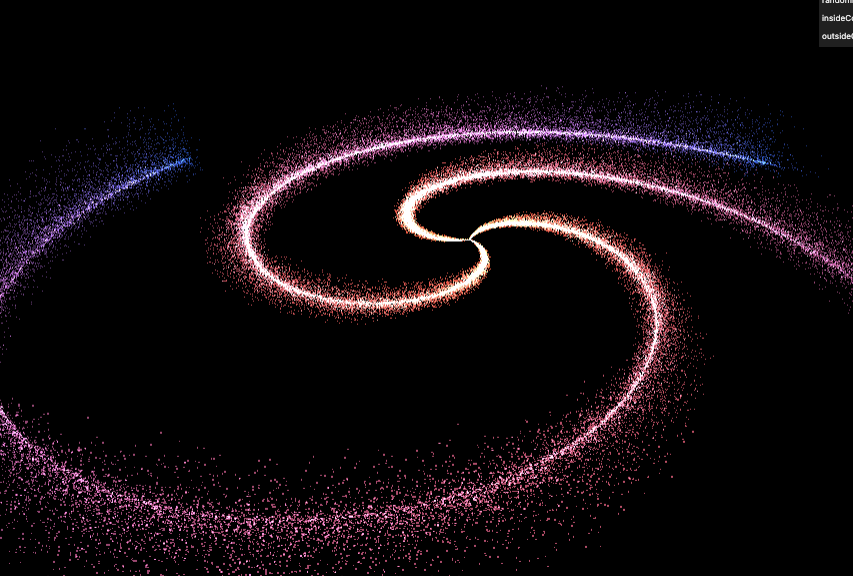
調整參數後樣式