
April 11, 2025
AntiThree(2) - banana
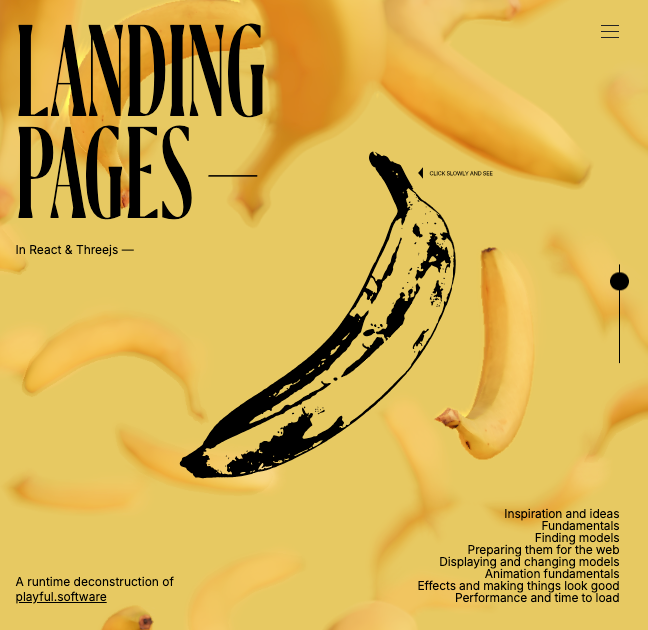
Banana
🔥 可利用概念
- 無限物體漂浮分佈與動畫
- 景深 與 LOD 使用
<Suspense>: 提供 3D model loading 的過程, 此處fallback={null}, 配合<FadeIn/>自己控制顯示畫面
/*
Gumroad tutorial: https://0xca0a.gumroad.com/l/B4N4N4S
-------------------------------------------------------------------------------
Model auto-generated by: https://github.com/pmndrs/gltfjsx
Author: thesidekick (https://sketchfab.com/thesidekick)
License: CC-BY-4.0 (http://creativecommons.org/licenses/by/4.0/)
Source: https://sketchfab.com/3d-models/banana-dda3a1f707a94c52bed79578e120937c
Title: Banana
*/

import { createRoot } from 'react-dom/client'
import { Suspense, useState } from 'react'
import './styles.css'
import Overlay from './layout/Overlay'
import { FadeIn, LeftMiddle } from './layout/styles'

import Bananas from './Bananas'
// Comment the above and uncomment the following to import the WebGL BG lazily for faster loading times
// const Bananas = lazy(() => import('./Bananas'))

function App() {
  const [speed, set] = useState(1)
  return (
    <>
      <Suspense fallback={null}>
        <Bananas speed={speed} />
        <FadeIn />
      </Suspense>
      <Overlay />
      <LeftMiddle>
        <input type="range" min="0" max="10" value={speed} step="1" onChange={(e) => set(e.target.value)} />
      </LeftMiddle>
    </>
  )
}

createRoot(document.getElementById('root')).render(<App />)
import * as THREE from 'three'
import { useRef, useState } from 'react'
import { Canvas, useThree, useFrame } from '@react-three/fiber'
import { useGLTF, Detailed, Environment } from '@react-three/drei'
import { EffectComposer, DepthOfField, ToneMapping } from '@react-three/postprocessing'
function Banana({ index, z, speed }) {
const ref = useRef()
const { viewport, camera } = useThree()
const { width, height } = viewport.getCurrentViewport(camera, [0, 0, -z])
// useGLTF is an abstraction around R3F's useLoader(GLTFLoader, url)
// It can automatically handle draco and meshopt-compressed assets without you having to
// worry about binaries and such ...
const { nodes, materials } = useGLTF('/banana-v1-transformed.glb')
const [data] = useState({
  y: THREE.MathUtils.randFloatSpread(height * 2),
  x: THREE.MathUtils.randFloatSpread(2),
  spin: THREE.MathUtils.randFloat(8, 12),
  // Some random rotations, Math.PI represents 360 degrees in radian
  rX: Math.random() * Math.PI,
  rZ: Math.random() * Math.PI
})
useFrame((state, dt) => {
if (dt < 0.1)
ref.current.position.set(
index === 0 ? 0 : data.x * width,
(data.y += dt * speed),
-z
);
// Rotate the object around
ref.current.rotation.set(
(data.rX += dt / data.spin),
Math.sin(index * 1000 + state.clock.elapsedTime / 10) * Math.PI,
(data.rZ += dt / data.spin)
);
// If they're too far up, set them back to the bottom
if (data.y > height * (index === 0 ? 4 : 1))
  data.y = -(height * (index === 0 ? 4 : 1));
});
// Using drei's detailed is a nice trick to reduce the vertex count because
// we don't need high resolution for objects in the distance. The model contains 3 decimated meshes ...
return (
<Detailed ref={ref} distances={[0, 65, 80]}>
<mesh geometry={nodes.banana_high.geometry} material={materials.skin} material-emissive="#ff9f00" />
<mesh geometry={nodes.banana_mid.geometry} material={materials.skin} material-emissive="#ff9f00" />
<mesh geometry={nodes.banana_low.geometry} material={materials.skin} material-emissive="#ff9f00" />
</Detailed>
)
}
export default function Bananas({ speed = 1, count = 80, depth = 80, easing = (x) => Math.sqrt(1 - Math.pow(x - 1, 2)) }) {
return (
// No need for antialias (faster), dpr clamps the resolution to 1.5 (also faster than full resolution)
// As of three > r154 if postprocessing is used the canvas can not have tonemapping (which is what "flat" is, no tonemapping)
<Canvas flat gl={{ antialias: false }} dpr={[1, 1.5]} camera={{ position: [0, 0, 10], fov: 20, near: 0.01, far: depth + 15 }}>
<color attach="background" args={['#ffbf40']} />
{/* As of three > r153 lights work differently in threejs, to get similar results as before you have to add decay={0} */}
<spotLight position={[10, 20, 10]} penumbra={1} decay={0} intensity={3} color="orange" />
{/* Using cubic easing here to spread out objects a little more interestingly, i wanted a sole big object up front ... */}
{Array.from({ length: count }, (_, i) => <Banana key={i} index={i} z={Math.round(easing(i / count) * depth)} speed={speed} /> /* prettier-ignore */)}
<Environment preset="sunset" />
{/* Multisampling (MSAA) is WebGL2 antialeasing, we don't need it (faster)
The normal-pass is not required either, saves a bit of performance */}
<EffectComposer disableNormalPass multisampling={0}>
<DepthOfField target={[0, 0, 60]} focalLength={0.4} bokehScale={14} height={700} />
{/* As of three > r154 tonemapping is not applied on rendertargets any longer, it requires a pass */}
<ToneMapping />
</EffectComposer>
</Canvas>
)
}
THREE.MathUtils: 給予浮動的範圍值 (e.g.THREE.MathUtils.randFloatSpread(2)給予 -1~1 的範圍值 )
(此處不應該使用 useState)
const [data] = useState({
y: THREE.MathUtils.randFloatSpread(height * 2),
x: THREE.MathUtils.randFloatSpread(2),
spin: THREE.MathUtils.randFloat(8, 12),
// Some random rotations, Math.PI represents 360 degrees in radian
rX: Math.random() * Math.PI,
rZ: Math.random() * Math.PI
})- 無限香蕉的真相, 會重置 data.y, 做出無限循環的樣子
if (data.y > height * (index === 0 ? 4 : 1))
data.y = -(height * (index === 0 ? 4 : 1));- LOD(Level of Detail)切換的距離門檻
- 攝影機距離 < 10, 顯示 hotpink 的 box
- 距離介於 10~20, 顯示 orange 的 box
- 距離 > 20, 顯示 gray 的 box
<Detailed ref={ref} distances={[10, 20]}>
  {/* <mesh geometry={nodes.banana_high.geometry} material={materials.skin} material-emissive="#ff9f00" /> */}
  {/* <mesh geometry={nodes.banana_mid.geometry} material={materials.skin} material-emissive="#ff9f00" /> */}
  {/* <mesh geometry={nodes.banana_low.geometry} material={materials.skin} material-emissive="#ff9f00" /> */}
  <mesh>
    <boxGeometry />
    <meshStandardMaterial color="hotpink" />
  </mesh>
  <mesh>
    <boxGeometry />
    <meshStandardMaterial color="orange" />
  </mesh>
  <mesh>
    <boxGeometry />
    <meshStandardMaterial color="gray" />
  </mesh>
</Detailed>- 模擬景深效果
<DepthOfField
  target={[0, 0, 60]}      // 對焦的目標位置,通常是某個物件的位置
  focalLength={0.4}        // 焦距,影響對焦範圍(越小越淺景深)
  bokehScale={14}          // 景深模糊的強度(越大模糊越明顯)
  height={700}             // 解決模糊效果的精細度,通常設為視窗高度
/>